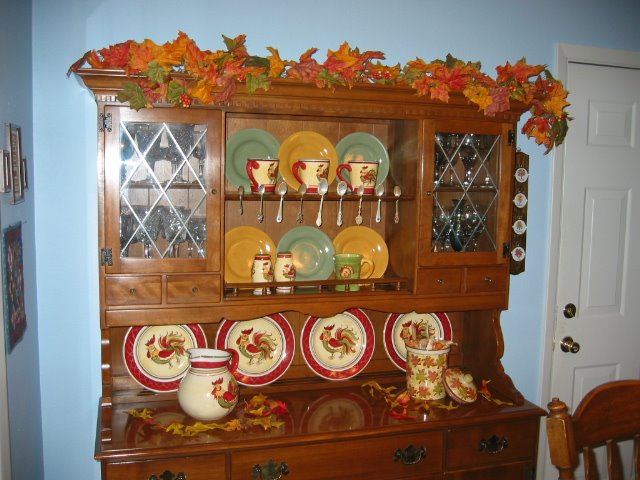
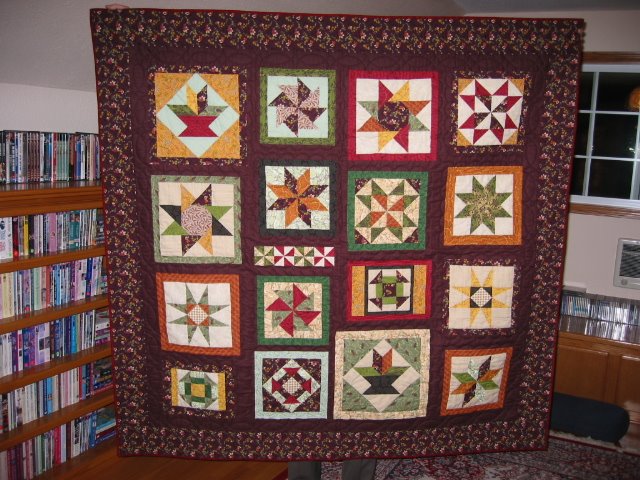
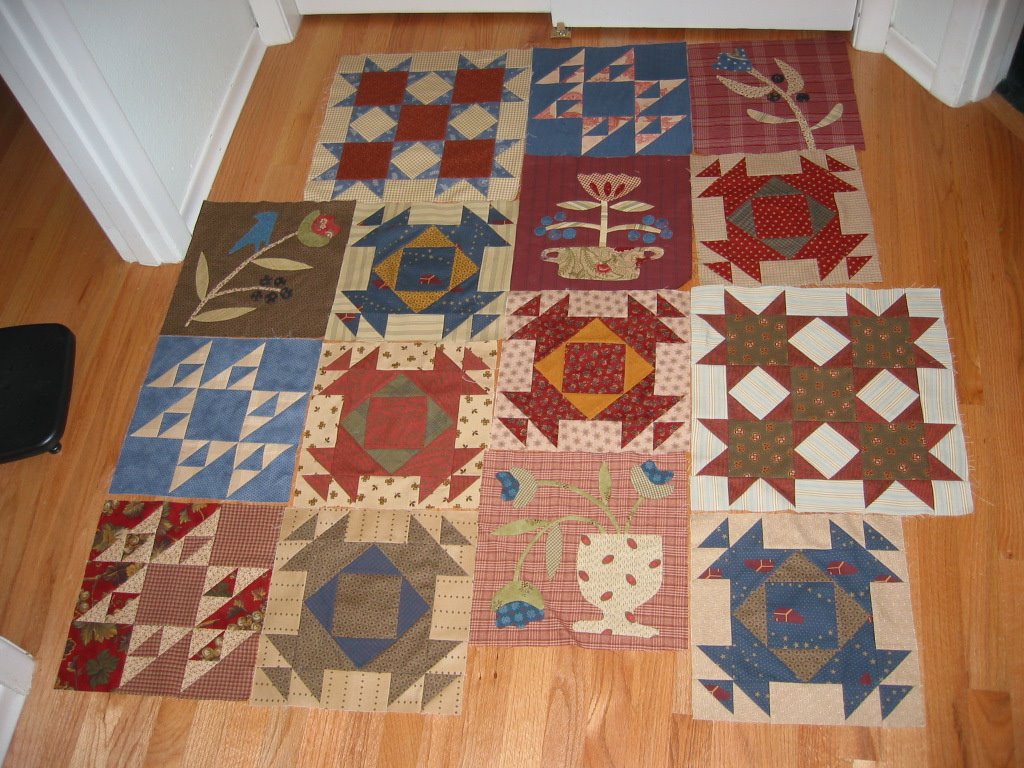
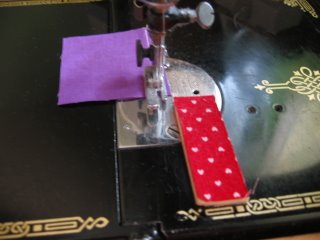
 I've added a picture to this post.I thought I would give you some preliminary information to think about while you are waiting for the seam allowance tutorial. Remember, this is what works for me. If this isn't something you want to worry about then don't - there are no quilt police. Just skip this post and the next one. I'm hoping you'll decide to stick around because what I'm going to show you is so easy, natural and painless that you won't know how you managed without it.All quilters know how to piece, unless they do nothing but appliqué. What many quilters don't know is how to do it precisely. Sometimes their points get chopped off and their seams don't come together where they should. Many quilters don't worry about this, and that is perfectly fine. Many worry about it a lot, struggle, do a lot of ripping, and can't figure out how to prevent it from happening over and over. This tutorial is for that latter group of piecers - the ones who worry.There are three key elements at work here: (1) accurate cutting, (2) accurate stitching, and (3) careful pressing (not ironing!). We'll save accurate cutting for another day. Careful pressing I've already talked about in a prior post. The lesson for this week is accurate stitching.
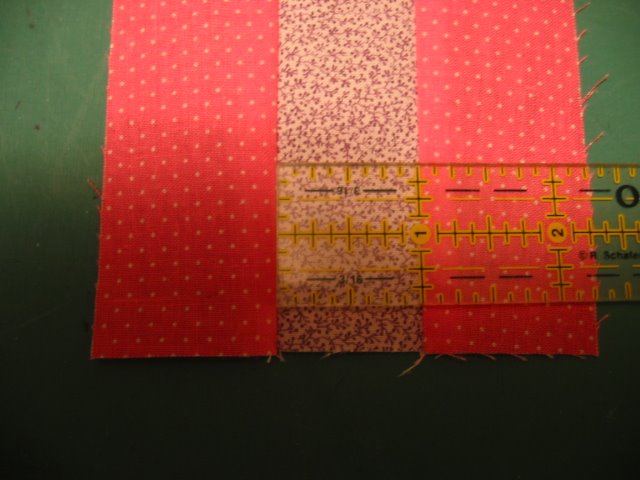
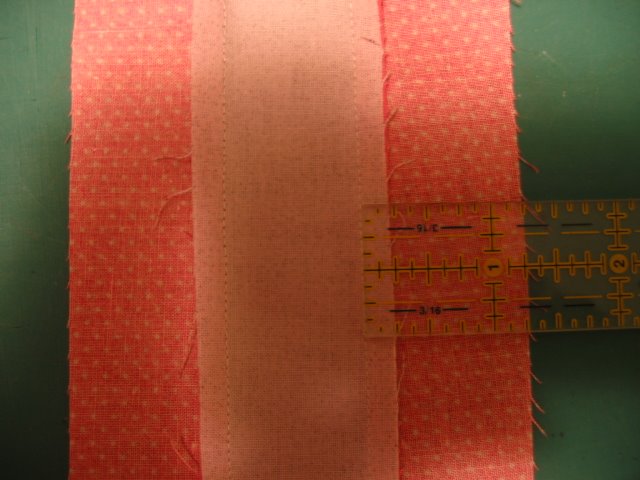
Stitching accurately is totally dependent on a consistent, accurate seam allowance. (Notice I didn't say anything about a 1/4" seam allowance - are you shocked?) Once you master that you will seldom if ever need to pin a block together before stitching. You will hardly ever need to square up a block. Your blocks will always be the same size when finished, and that size will be exactly what the pattern says it should be, whether the pattern is from a book, a purchased pattern or magazine, or a pattern you designed yourself. You can master this without any special attachment - no 1/4" foot is required. I piece everything on my featherweight, and though I have two different quarter inch feet I hardly ever use them.
The key is to find the correct seam allowance that will make the finished block parts measure exactly what they are supposed to measure. Usually that will NOT be a true 1/4" seam. If you take a true 1/4" seam you probably have problems, at least now and then. There is a good reason for this - the thickness of the thread you use takes up a little bit of space, as does the turn of the cloth when the seam is pressed to the side. If you stitch with a true 1/4" seam, the turn of the cloth and thickness of the thread subtracts from the size of the finished piece rather than the seam allowance itself. This is especially true for rotary cut pieces, as rotary cut pieces to begin with tend to be a tiny bit smaller than pieces cut the old fashioned way with templates. I'm not sure why this is true, but it is. It probably has something to do with the thickness of the pencil line traced around the templates, and where one cuts on that pencil line. So the correct size seam will be a scant 1/4" - almost as small as a 3/16" seam. Exactly how scant depends on your machine, the way you press and the thread you use. All 50 wt. thread is not the same thickness - did you know that? Some threads such as Aurifil than be thinner than others such as Guttermann or Coats and Clark even though they are both 50 wt.
Stay tuned - I'm going to teach you how to find the exact scant 1/4" that is right for your machine, the way you press, and the thread you use. Then once you've determined the width for "your" seam allowance, I'll show you how easy it is to keep it exactly the width it should be from day to day, week to week and year to year (as long as you don't change machines and/or thread types).
************
Gratitudes:
1. Morning meeting at work cancelled
2. Rain on my windshield.
3. Delightful people who work at our Starbucks
4. Colored printers and colored markers
5. Fat free half-and-half - an oxymoron if I've ever heard one!
************

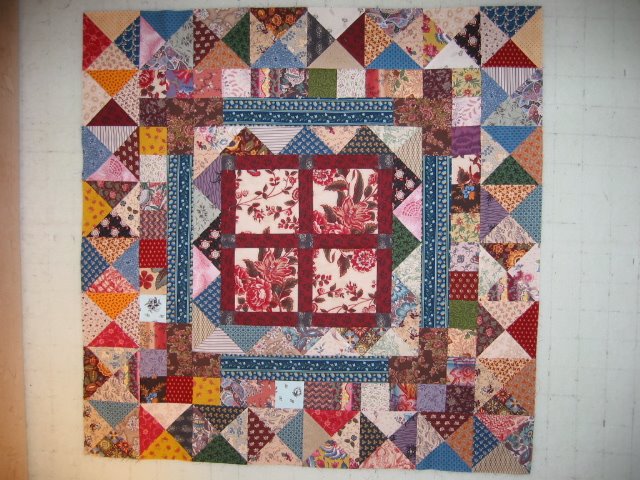
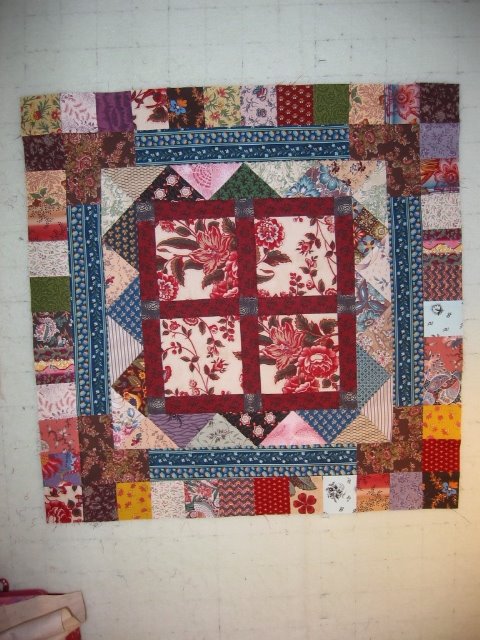
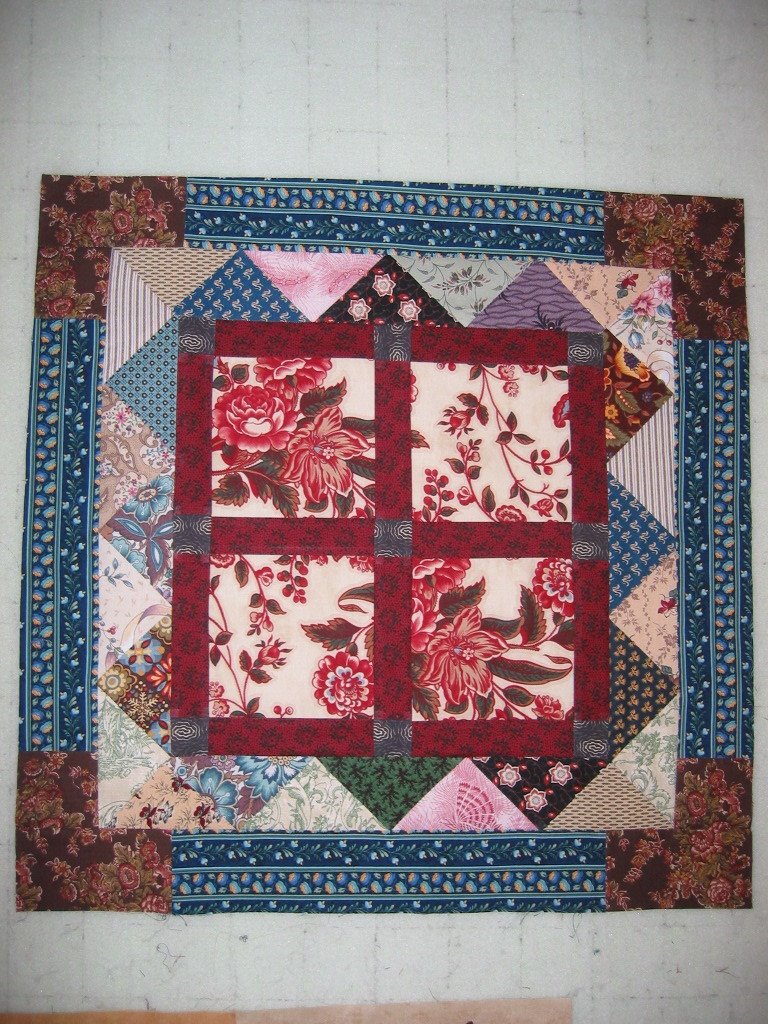
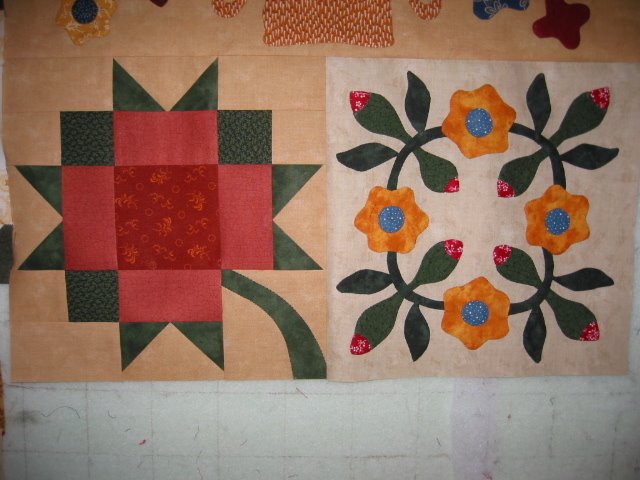
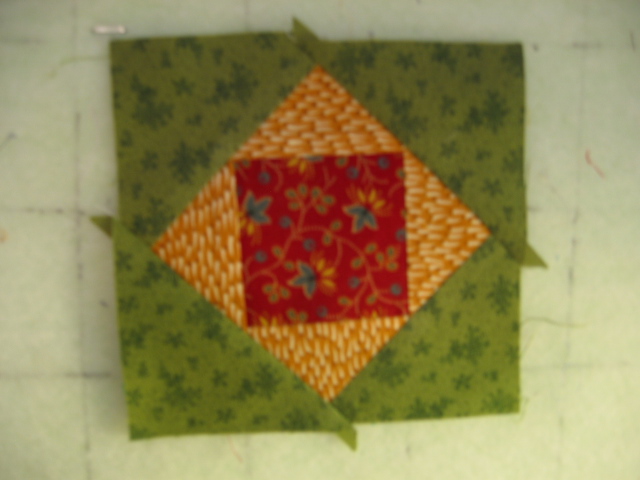
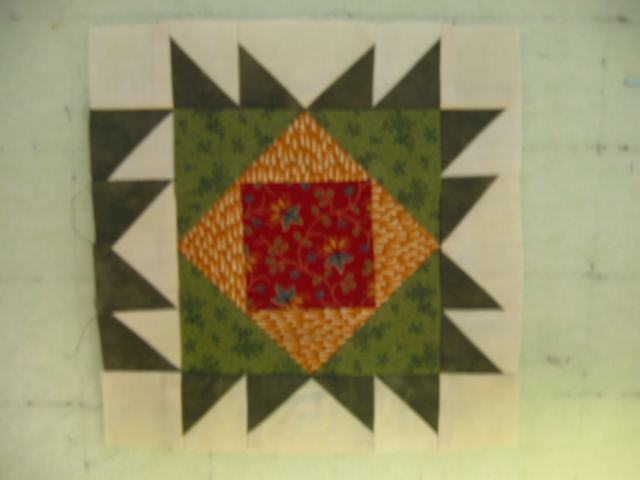
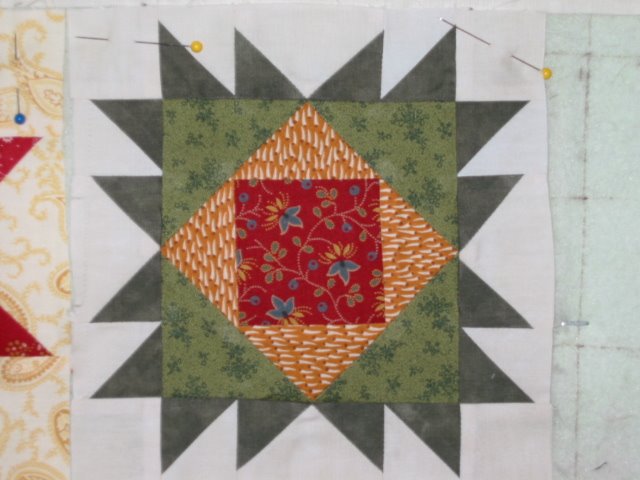
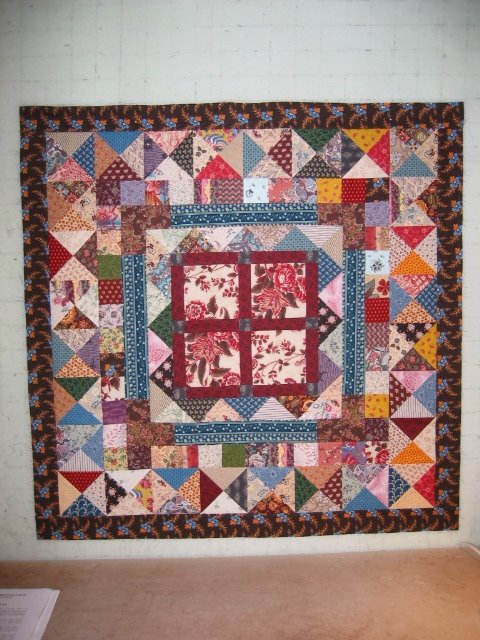 Round 3 is a "Plain Jane" round - at least that's what our instructor calls it. It's used to create a visual break and a place for the eyes to rest, as well as a chance to "correct" the size of the piece so far. Finished measurement after this round is 36".
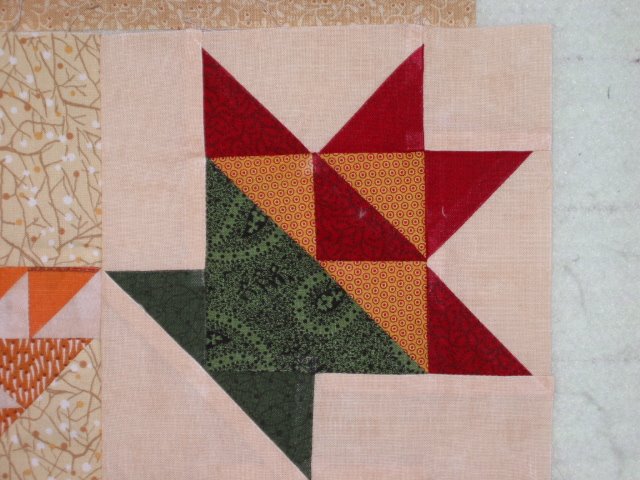
 "cornerstones" for the next border. I'm doing four Ohio stars with chintz centers. "Round 5", which is the round we received instructions for on Thursday night, will complete this fourth border. I'm leaning toward doing dark flying geese with light backgrounds, though there are several other blocks to choose from. Choices, choices - I may eventually decide I need to make three different medallions!