Thursday, September 14, 2006

Seam Allowance Part II

Updated - Click on the pictures to enlarge.

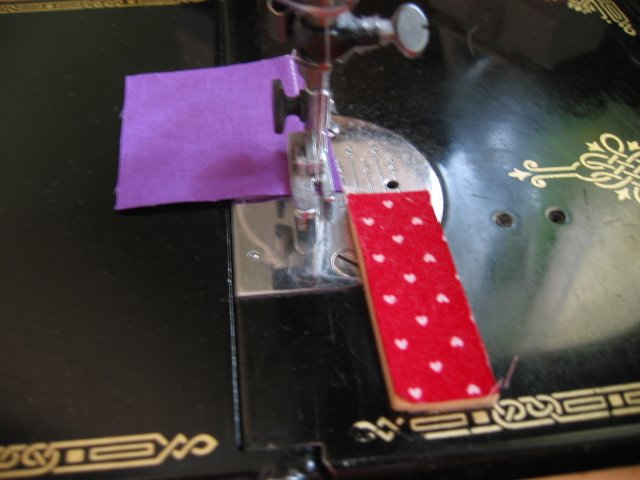
Notice the little red "wall" with the white hearts on it? That's the secret. You want to build yourself a little "wall" that is the exact seam allowance width away from the needle that you need. Mine is a fancy little wall that you can get at quilt shops - I got it in a goodie bag. A built up wall of masking tape works fine - that's what I used for years. A piece of moleskin or other "foot stuff" that has a sticky side works well. Many people use a pad of Post-It's that they've ripped off so it's just the right height. You want it tall enough so you can easily butt the edge of your fabric right up next to it but not so tall that any pins you have in the block won't glide over the top of it. You'll sew your seam as much by feel as by sight - my fingertips have become very sensitive as to whether or not the fabric is just touching the edge of the wall as I sew.

Notice the wall starts considerably in front of the presser foot. That's the problem with 1/4" feet - the fabric needs to be in the right position in front of the foot in addition to under the foot. That way you know it is going straight through and not at an angle. If your feed dogs get in the way of your "wall" - which may very well happen on a zigzag machine, just cut square notch out of the "wall" to expose the feed dogs at that spot. If you have a featherweight, make sure it doesn't extend over the gold paint as it will eventually cause the paint to flake off.
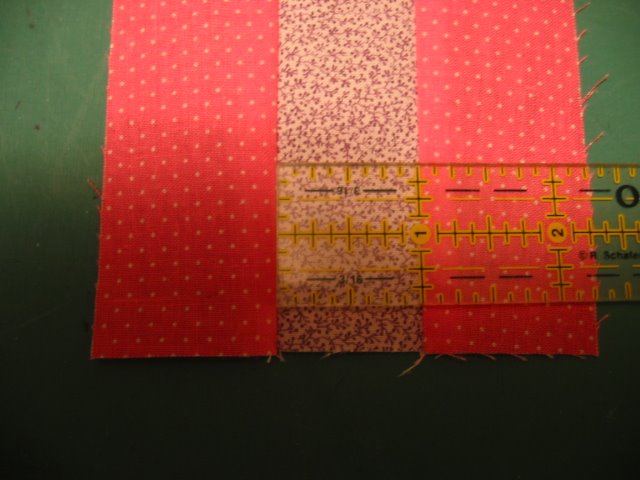
Position a ruler under your presser foot, and drop the needle so it touches the far right edge of the 1/4" line. Make sure the ruler is straight front to back, then drop the presser foot. While the ruler is in place build your "wall" so it is exactly next to the edge of the ruler. Make it a fat 1/8" tall, or a little taller. 1/4" is too tall. Remove the ruler.

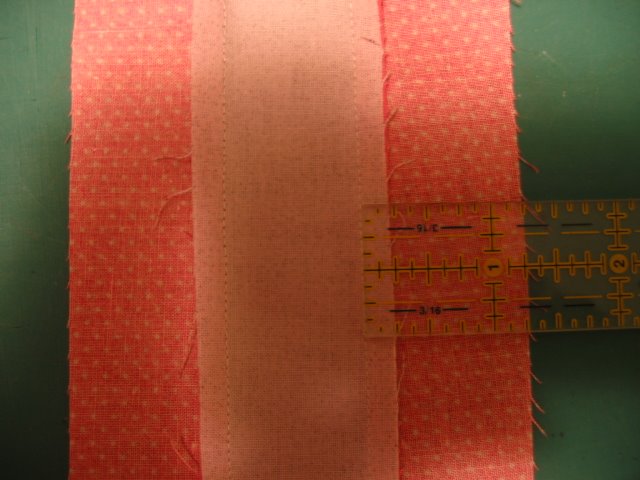
Cut 3 short 1 1/2" strips - I use about 4" lengths - two dark and one light. Using your "wall" as a guide, seam it together as shown in the picture. Press well to the dark strip. I use steam. Measure the finished size of the center strip with your ruler. It should measure exactly 1". If it's too narrow then your seam allowance is too fat, and you need to move your wall a smidgen to the left toward the needle. If the center strip is too fat, then your seam allowance is too narrow, and you need to move the "wall" a smidgen to the right away from your needle. Move the "wall", then do another test piece. Keep working at it until the center strip measures exactly 1". It might take a few tries, but once you have it you are set! As long as you train your eyes and your fingertips to keep the edge of your seam right next to the "wall" - and it doesn't take long at all to train them - your seam allowance will be the perfect width for your personal pressing and cutting methods, machine and thread.

If your machine has a top loading bobbin then your "wall" will go right over the bobbin opening. You can still make this work for you if you take an exacto knife and slice straight across the "wall" right where the door over the top of the bobbin opens. Sort of like a draw bridge opening. Your "wall" can split in half, with half staying with the machine and half lifting with the bobbin case. When you replace the bobbin cover the entire "wall" is back in position. (Thank you, Quilt Pixie, for reminding me that I forgot to address this issue.)

Notice in the picture of the wrong side that how the seam allowance is a scant 1/4" - it doesn't even touch the 1/4" mark on the ruler.

More to follow - opposing seams and a bit more about pressing.

Precision Piecing - the beginning

I've added a picture to this post.

I thought I would give you some preliminary information to think about while you are waiting for the seam allowance tutorial. Remember, this is what works for me. If this isn't something you want to worry about then don't - there are no quilt police. Just skip this post and the next one. I'm hoping you'll decide to stick around because what I'm going to show you is so easy, natural and painless that you won't know how you managed without it.

All quilters know how to piece, unless they do nothing but appliqué. What many quilters don't know is how to do it precisely. Sometimes their points get chopped off and their seams don't come together where they should. Many quilters don't worry about this, and that is perfectly fine. Many worry about it a lot, struggle, do a lot of ripping, and can't figure out how to prevent it from happening over and over. This tutorial is for that latter group of piecers - the ones who worry.

There are three key elements at work here: (1) accurate cutting, (2) accurate stitching, and (3) careful pressing (not ironing!). We'll save accurate cutting for another day. Careful pressing I've already talked about in a prior post. The lesson for this week is accurate stitching.

Stitching accurately is totally dependent on a consistent, accurate seam allowance. (Notice I didn't say anything about a 1/4" seam allowance - are you shocked?) Once you master that you will seldom if ever need to pin a block together before stitching. You will hardly ever need to square up a block. Your blocks will always be the same size when finished, and that size will be exactly what the pattern says it should be, whether the pattern is from a book, a purchased pattern or magazine, or a pattern you designed yourself. You can master this without any special attachment - no 1/4" foot is required. I piece everything on my featherweight, and though I have two different quarter inch feet I hardly ever use them.
The key is to find the correct seam allowance that will make the finished block parts measure exactly what they are supposed to measure. Usually that will NOT be a true 1/4" seam. If you take a true 1/4" seam you probably have problems, at least now and then. There is a good reason for this - the thickness of the thread you use takes up a little bit of space, as does the turn of the cloth when the seam is pressed to the side. If you stitch with a true 1/4" seam, the turn of the cloth and thickness of the thread subtracts from the size of the finished piece rather than the seam allowance itself. This is especially true for rotary cut pieces, as rotary cut pieces to begin with tend to be a tiny bit smaller than pieces cut the old fashioned way with templates. I'm not sure why this is true, but it is. It probably has something to do with the thickness of the pencil line traced around the templates, and where one cuts on that pencil line. So the correct size seam will be a scant 1/4" - almost as small as a 3/16" seam. Exactly how scant depends on your machine, the way you press and the thread you use. All 50 wt. thread is not the same thickness - did you know that? Some threads such as Aurifil than be thinner than others such as Guttermann or Coats and Clark even though they are both 50 wt.

Stay tuned - I'm going to teach you how to find the exact scant 1/4" that is right for your machine, the way you press, and the thread you use. Then once you've determined the width for "your" seam allowance, I'll show you how easy it is to keep it exactly the width it should be from day to day, week to week and year to year (as long as you don't change machines and/or thread types).

************
Gratitudes:

1. Morning meeting at work cancelled
2. Rain on my windshield.
3. Delightful people who work at our Starbucks
4. Colored printers and colored markers
5. Fat free half-and-half - an oxymoron if I've ever heard one!

************


Wednesday, September 13, 2006

Tiny geese


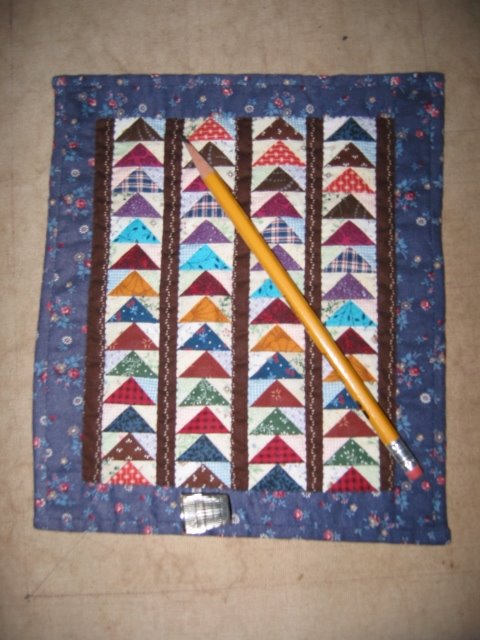
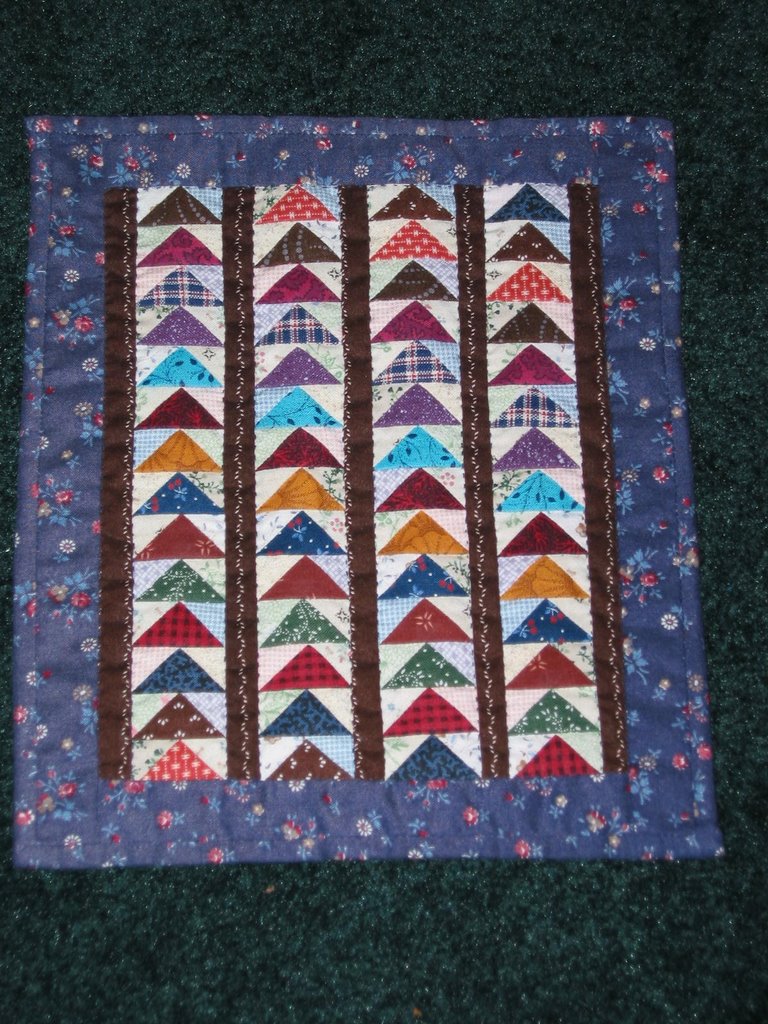
Evelyn asked me to take a picture of the miniature Flying Geese quilt with my thimble so you could compare the size of the thimble to the size of a goose. I decided to throw in the pencil to just for fun. The larger "goose" triangle is a 1 1/2" square cut diagonally in both directions. The two smaller triangles in each "goose" are made from a 1" square cut once diagonally. The finished "goose" measures 1/2" x 1". This was the first time I'd ever tried paper piecing and it was so easy because all the triangles were cut exactly the right size needed. None of that guessing that you've cut the fabric big enough - that's the problem I usually have with paper piecing. This one was so much fun to make! I did all four rows of geese in the morning class at guild, then came home in the afternoon and sewed the top together. I had it quilted and finished by bedtime. I don't bind these little ones - instead I turn the back to the front, fold under the edge and hand stitch it down. The only quilting on this one is in the ditch on the vertical rows. It was too think to hand quilt anywhere else in the body of the quilt and the borders were too narrow. I posted the picture I took today and the old picture so you can see how much this has faded. It is made from 80's calicos which have very poor fade resistance. The label on the back says I made this is 1992.

When I was reading and answering comments about the miniatures I realized that a post on how I get such precision by using a seam allowance trick might be appropriate. The key to these little guys isn't talent at all - it's the ability to sew a perfect 1/4" seam. I can show you very easy way to do that. It's the way I taught ever student I ever had, and is basically foolproof. Once you can do that you can piece anything, no matter how difficult. I just need to take a few pictures to illustrate the post. I'll try to get that done in the next 2-3 days if you readers are interested.

Bedtime now - 5:00 a.m. comes very early. Suddenly it seems so dark in the morning when I get up, and I'm using my headlights when I leave home at 6:30. A sure sign fall is here - that and the cool evenings and golden leaves I noticed on some of the trees on my way to work this morning. I love fall!

************
Gratitudes:

1. Fall weather
2. Fall colors
3. Fall breakfasts of oatmeal with cream, raisins and brown sugar
4. Fall colored prints and plaids in my stash
5. Fall decorations

Did I happen to tell you fall is my favorite season?

************

Tuesday, September 12, 2006

Miniatures

Here are more of my past projects. I love making miniatures, and at one time made a bunch of them. A few are paper pieced but most of them are not. The designs come from an older book I have by Donna Thomas called Small Talk, published in 1991. Her directions are fantastic. They are done with the standard 1/4" seams, which are then trimmed to 1/8". Miniatures are lots of fun to make because they go together so quickly, you can have a completely finished quilt in a day or two, they take very little fabric, they make great gifts unless you give them to a non-quilty person who thinks they are a potholder, they look great on the wall or in baskets, draped over a miniature quilt rack or displayed with teddy bears and or dolls. They don't use up stash very quickly - that's about the only downside I can think of. They aren't hard as long as you can sew a true 1/4" seam - and are especially easy if they are paper pieced.

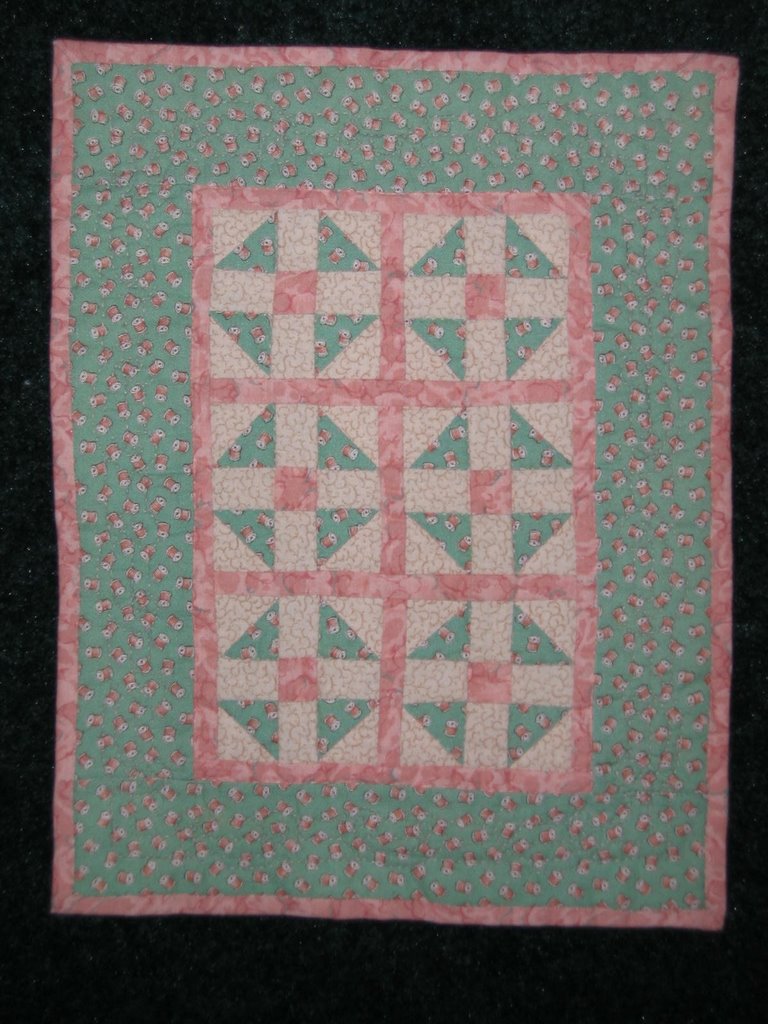
The first quilt, Cake Stand, measures 11" x 13". The second quilt, is Churn Dash. It measures 9" x 12". The third quilt. The Double Irish Chain measures 10" x 13". Cross-eyed Puss is my favorite. It measures 10" square. Shoe Fly is a little larger in scale with only 6 blocks - it's one of the "beginner" lessons - and measures 8" x 10". All of these quilts are from "Small Talk" by Donna Lynn Thomas.

The sampler was made in a class at a retreat called "Quilting By the Sea" sponsored by two Oregon quilt shops. I made it in 1992. It measures 10" x 14". It was a lot of fun to make.

The last two are paper pieced. The log cabin was totally out of my scrap "string' bin. It measures 16" square. This is the first time I ever tried using the back side of a fabric for a "light". It worked well! After all, you pay for both sides of the fabric. The Flying Geese is paper pieced, and was done in a guild class in the early 90's. It's a tiny 7" x 8". These two have been displayed a lot and are very faded. Just makes them look old - in my humble opinion of course!

If you've not tried miniatures but are a confident piecer you should give them a try. Bet you can't make just one!

************
Gratitudes:

1. Quilting friends at my house tonight.
2. Dove ice cream bars for treats
3. A patient, understanding hubby
4. Co-worker friends
5. A shoulder to lean on when needed.

************


This was no surprise!

A lot of these little quizzes ask silly questions and don't give one the chance to answer "none of the above". This one, that I found on Beth's blog, intrigued me enough to try it. I wanted to see if I really knew myself as well as I thought I did. The answer is a resounding yes - should be after 59 years, right?

Your Brain is 67% Female, 33% Male

Your brain leans female
You think with your heart, not your head
Sweet and considerate, you are a giver
But you're tough enough not to let anyone take advantage of you!


It's been a particularly tough last day and a half at work. I received some news yesterday morning about changes that are coming next April 1st when my supervisor retires. Right now I'll just say that the change will create a huge challenge for me. That's not what I'd like to say, but that's definitely all I should say. That, and the fact than now I'm more motivated than ever to pay off our house, CRV and longarm so I can retire. The sooner the better. Another very good reason to stay out of virtual and cyber quilt shops, and away from buying fabric!
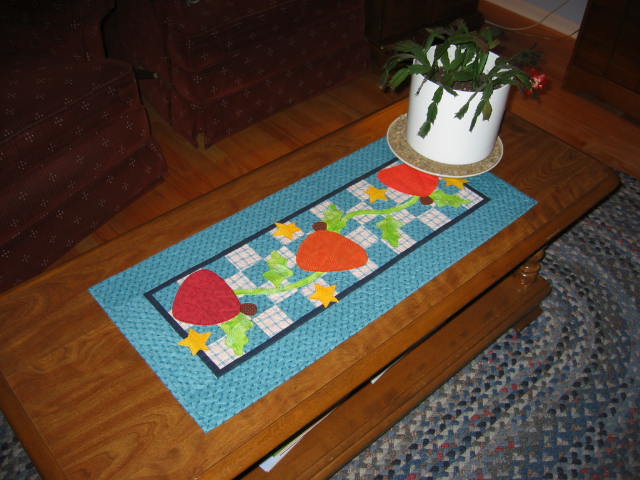
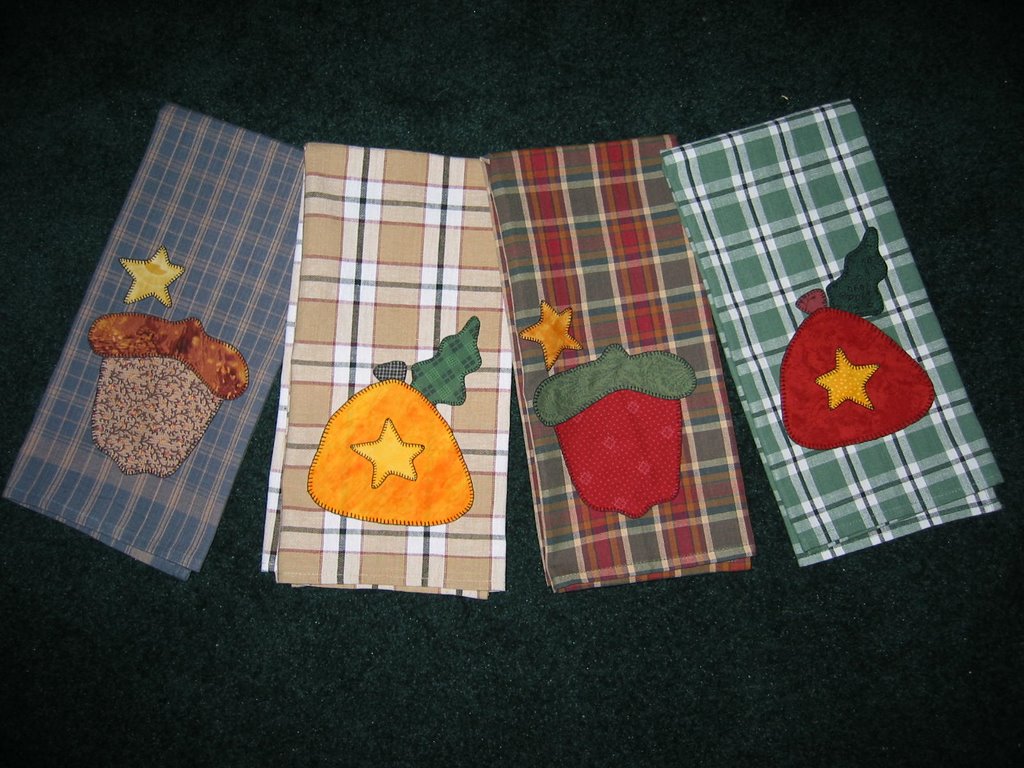
I don't have any new quilt pictures to post, so I'll post pictures of projects from the past - just because I want to post something. There's just something about fall that gets me into the total quilty-sewing mood. Sharing old projects is better than sharing nothing, right? Here is a table runner and fall kitchen towels that I made a few years ago. The table runner and pumpkin and acorn appliqués were designed by Pat Sloan and shared with the members of her yahoo groups email list. Getting these out is the beginning of fall decorating at our house. Sorry the pictures are so small - I had to pull them off my webshots page as I'm on break at work. I'll replace them with the full size pictures when I get home later this afternoon.

Sunday, September 10, 2006

Checking in

It's been almost a week since I posted - I can hardly believe that. It's been a hectic week and I've been home very little - time has really flown. It's been a struggle just keeping up with reading all your blogs, and I'm way behind reading posts on my various Yahoo Groups lists. Classes to teach and meetings to attend three of the four days at work, quilt group Tuesday night, time with the kids Wednesday night and North Star Quilters meeting on Thursday. (It was a nice break not having guild meetings in the summer - one reason I got in more quilting I think.) September brings the string of Tuesday, Wednesday and Thursday commitments that doesn't end until next July. I love every minute of it, but it doesn't leave much time for doing my own quilty things at home.

Now that the weather has moderated and it's tolerable upstairs in the quilt room, I've finished quilting Broken Dishes. I'll post a picture of the finished quilt when I get it bound. Right now that must take a back seat to the two baby quilts for customers, the North Star Quilters donation quilt for the Northwest Medical Teams quilt auction, and our Quilt Pink project. The first baby quilt is promised by tomorrow, so I must get that one done today.

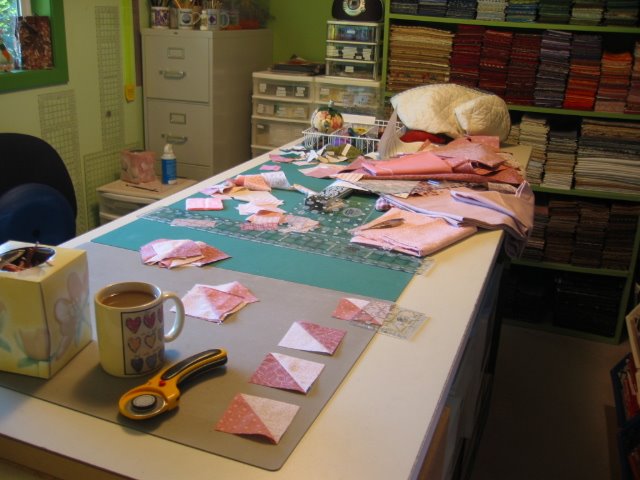
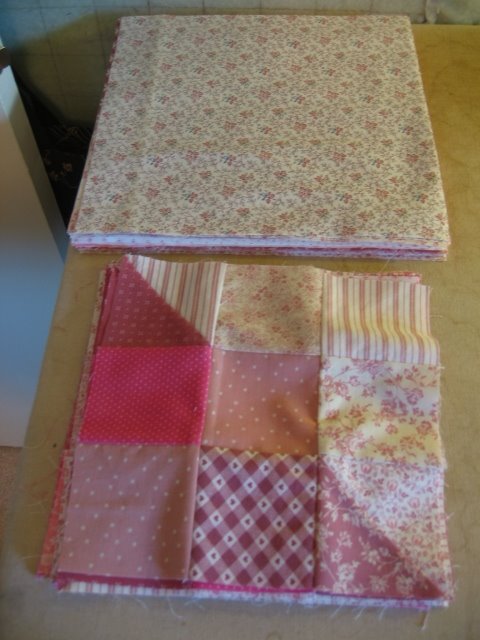
I've spent a good deal of the weekend working on the blocks for our Quilt Pink project. North Start Quilters is having a Quilt Pink sew-in on September 30th - Quilt Pink Day. (If you don't know what Quilt Pink Day is check out the website.) We are all bringing pink and white blocks that we've sewn using the Scrapaholic block pattern, as well as 10" squares for constructing a quilt back ala Bonnie at Quiltville. At the sew in we will put all the blocks together and make the back. I figured this was an excellent opportunity to bust my stash of all the pink and white fabrics that I've had for years. Making these blocks is like eating candy - I just can't stop! I've made over 30 so far, and have cut at least 20, 10" squares, and I'm still sewing. Seems like we needed only 6-8 blocks from each of us, but I'm having too much fun to stop. Besides, I want to use up all these fabrics. At this rate I figure we can donate two quilts instead of just one.

I'll talk about our donation quilt for the Northwest Medical Team's quilt auction in a later post, as I really need to get back to sewing if I'm going to get that baby quilt done today. I hope everyone is having a terrific weekend!

************
Gratitudes:

1. The freely giving hearts of quilters around the world.
2. Hot tea with milk
3. My new featherweight cabinet - it's everything I hoped it would be.
4. Quilt guilds
5. Magnificent fall weather

************

Monday, September 4, 2006

Appliqué hints

Another great day yesterday - almost all my fabric is treated and put away. I have only 8-10 pieces left to do this morning. Then on to the next item - don't know what that'll be yet. I'll have to see what strikes my fancy.

A few readers have asked questions about my appliqué. I wrote a bunch of hints for a couple people who asked. This morning it occurred to me that these would make a good post, as they might help others too. So here is my gift to you this Labor Day morning - lots of hints to make your needleturning easier. I've included a couple pictures. You should get the larger version of you click on them. Let me know if you want pictures of any other part of the process.

Disclaimer - this is what works for me. If you do something differently and it works for you, that's great!

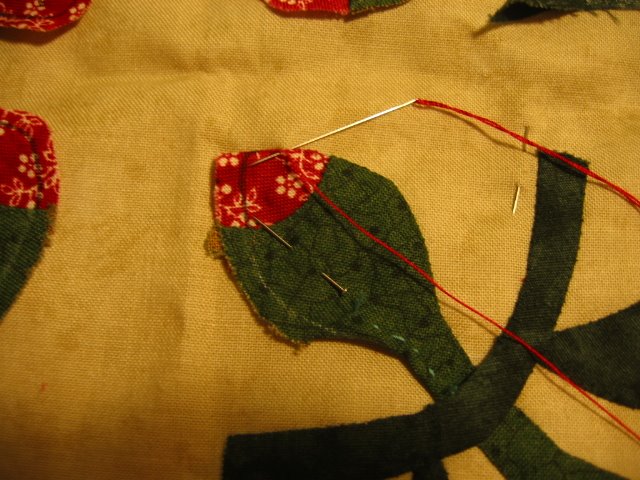
Start with an easy design with large pieces. Folk art designs are great for this, but so are many others. Choose one with gentle curves and no sharp points if you are new to appliqué. No really skinny stems either. Unless my stem is a long winding viney stem, I use a freezer paper template for it instead of a bias strip.

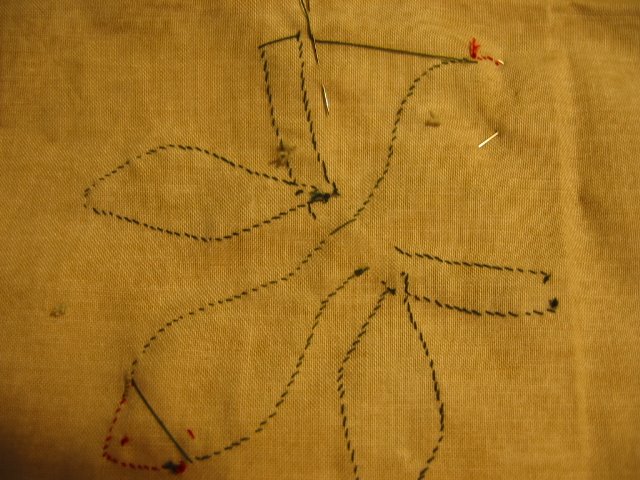
1. Trace the design onto freezer paper one piece at a time. (I use a pencil). Where pieces overlap - if there is no separate piece to trace - I use a dotted line along that edge. That tells me I need to allow some extra fabric there for tucking under a different piece.

2. Use good sharp paper scissors - I use older embroidery scissors - to cut out each freezer paper shape.

3. Choose fabrics for the various pieces of the design. Iron the freezer paper templates onto the right side of the fabrics. Space them far enough apart that you can cut a scant 1/4" seam around each piece. Trace around the freezer paper shapes with a fine point black Sharpie or a white chalk pencil or gel pen. If it's a dotted line don't trace across that part. This is in case there is some shift during the appliqué - and there always seems to be - you don't want that Sharpie line to show. I also don't trace across the bottom and top part of a stem - just in case I have to place a flower or leaf a little higher. Instead I mark tiny slashes in the seam allowance only to show where the stem should tuck under a flower or leaf. When there is a curve in the template shape put the curve on the bias as much as possible. Bias edges needle turn into a smooth curve much more easily than straight grain does.

4. Cut around each appliqué piece with sharp scissors, leaving a scant 1/4" seam all the way around. Where one piece tucks under another - noted by the dashed lines - I usually leave more than 1/4". For example, if it's a flower bud that is tucking into a u-shaped base I usually leave a good half inch beyond the dotted u-shaped line, and I don't mark that inner u-shape, because often the bud doesn't tuck down as far as you think it will and you want to have enough seam allowance left. Don't trim anything narrower than 1/4" - including points and sharp outer curves - you'll do that later as you stitch.

5. Remove the freezer paper.

6. Arrange your pieces on the background. If the pattern provides a layout I do this on a light box. If necessary I trace over the entire design with a black felt pen - wider tip this time - and put it on the lightbox, taping down the corners. Then I put my background on top of that and put my pieces into place. I use little dots of Roxanne's glue to hold them down. Try to keep the glue away from the edges. Where one piece tucks under another leave that part of the top piece free. You can pin it out of the way while you are appliquéing down the bottom piece. If you don't have a layout provided just eyeball the placement according to the picture. Most of the designs I do have no layout provided. I usually use a combination of tiny dots of Roxanne's and sequin pins to keep my pieces into place.

7. For stitching I use a #11 sharp - I prefer John James. Many people like to use the longer straw needles. I've tried them but don't care for them as much. Use whichever you like, but not a between. It is way too short to be a good tool for appliqué. Currently I use silk thread, but am switching to DMC machine embroidery thread as I use up the silk thread. The thread should match the piece you are stitching as closely as possible. If you don't have an exact match go a little darker rather than lighter. I tend to be lazy and use long pieces of thread, but it's better to stick to nothing longer than 18" to 20". Use a quilter's knot at the end. Always thread the end as it comes off the spool into your needle, and tie a knot in the end where you cut it off the spool. If you do it the other way around you will get lots more knots and twists in your thread because of the direction of the twist in the titself itsel f. I like to run my thread through Thread Heaven before I start stitching. It's a thread conditioner that also lessens knots and twisting.

8. When you start to stitch a piece, start on a fairly straight section of the piece if possible. Don't start at a corner or a point. Your start will be much more invisible this way. Before you start to stitch finger press the seam allowance under. You want to fold exactly next to the black Sharpie line so the black line is just turned to the wrong side of the piece. Turn under a very little at a time, pinching with your fingers as you turn before moving along. The edges don't stay turned under, but you are "giving the fabric a message" as to where you want it to turn under. This makes the needle turning much easier. If it's a large piece I finger press only part of it at a time.

9. Pick your starting place, and with the edge of your needle - NOT the point! - or your fingers turn the edge under a little way. Don't try to turn more than a scant inch at a time. Hold this turned under with the thumb nail on the hand that isn't holding the needle. The edge you are stitching is away from you - the piece you are stitching is between you and the edge you are working on. If your thumb nail is too short use the tip of your thumb, though that is a bit harder. Now, while you hold that edge under with your thumb nail, bring you needle up through the background and just barely grab the folded edge of the appliqué. Pull up the thread all the way. Now put your needle straight down through only the background right next to where it just came up into the appliqué edge. Your stitches should be exactly vertical to the edge of the appliqué like this - l l l l. They should not look like this on the right side - \ \ \ \ \ . The slant is on the wrong side. In one motion you will put that needle down through the background only, then slant the needle a little and come up through the folded edge of the appliqué about 1/16" to the left (or right if you are left handed) of the first stitch. You will be working from the right to the left around the appliqué piece if you are right handed, and left to right if you are left handed.

10. Here are the important things to keep in mind as you stitch in order for the stitches to be as invisible as possible: (1) match the thread to your appliqué piece, (2) your stitch from the back to the front through the appliqué piece should be as close to the fold as possible and still catch the piece, (3) the stitch back down through the background only must be straight up from the place you just came to the front - not at a slant.

11. The stitches can be a bit farther apart when you are stitching a straight stretch, but must be closer together around curves and points. I keep my stitches small enough that I usually get between 16 and 20 stitches per inch. Sounds like it would take forever but it doesn't - the more you practice the faster you get.

12. Stitch up to about a fat 1/8" of where you have the piece turned under and stop. Using the side of your needle push under another inch or so of seam allowance and once again secure it with your thumbnail. Little pointy places along the edge are caused by stitching right up to the spot where the turn under ends. Don't stitch that far before turning under the next section.


13. Inner curves should be clipped just up to the sharpie line as often as needed in order to get a smooth turn. Outer curves aren't clipped at all. In each case you will use the edge of your needle to smooth the seam allowance under the piece. When it's an inner curve one sweep of the needle side usually does it. If it is an outer curve you often have to "play" with it a little in order to distribute the fullness in the seam allowance evenly. I slowly sweep the needle edge back and forth, feeling with my left thumb as I do it. I can feel when it is flat on the underside, which is when I secure it with my nail and start stitching again. Don't stitch until you are satisfied with the way it looks. You never use the point of the needle to do any of the sweeping or turning because the needle point will cause the fabric to fray. Make sure you get the dark sharpie line turned under all the way around.

14. Tighter outside curves often mean trimming the seam allowance down to a fat 1/8" in order to lessen the bulk of the seam allowance. Trim a little at a time in front of where you are stitching so the piece doesn't fray before you get it stitched down.

15. When you are doing a point, finger press the seam allowance all the way to the point on one side. If it's a fairly sharp point you'll even see the seam allowance sticking out from under the piece. Stitch it all the way to the point before trimming anything. Secure the point by taking a second stitch on top of the first one. Now fold the appliqué piece back gently to expose the seam allowance and the seam you just stitched. After stitching you can trim this very close to the stitching - on the stitched side only. Now, use the side of the needle to sweep the seam allowance on the point itself down under what you just stitched. Don't worry if some of it still shows along the edge you've not stitched yet - it will unless it's a very fat point. Take a single stitch directly at the point. If you make it a little longer than the other stitches and the thread matches, the longer stitch will give the optical illusion of a very sharp point that is really thread, not fabric. Once this stitch is in place you can cut off the point of the seam allowance so it's short enough to sweep under the appliqué piece with the side of your needle. If the point is sharp you will need to push hard with that needle to squish all the seam allowance under the point. That's why your stitches here must be very tiny and close together. Once you've shoved it all under the point hold it with your thumb nail and stitch down the other side of the point.


16. A good tool for helping with stubborn spots is a toothpick with a fairly blunt point. The ones I use are pointed on only one end. They are hard to find. I keep the toothpick in my mouth so the point is moist. Use this to shove under stubborn areas, as the fabric clings to the moist wood. The blunt point won't fray the fabric like the point of your needle will. This is especially useful on sharp outer points like star tips and the tips of skinny leaves, as well as when a couple little fabric threads won't tuck under on an inner point.

17. For inner points, stitch down to less than 1" from the inner point. Now clip directly into the point just into the sharpie marking. Sweep the seam allowance under with the side of your needle and stitch down to that inner point. Take two stitches directly on top of each other at the point. Now sweep the next part of the seam allowance under with the side of the needle and keep stitching up the other side of the inner point.

18. To tie off, take your final stitch and leave the thread on the backside. Hide your knot behind the appliqué piece. Take a tiny stitch, then run you needle twice through the loop of thread formed by the stitch and pull the knot tight. Now slip your needle into just the background behind the piece and run the thread away from the knot for a good inch. Pull it out toward the back and clip.

I hope you find these tips useful.

Sunday, September 3, 2006

Prewashing fabric

I had quite a few comments on my last post about prewashing fabric, so I thought I talk a little about why I do this. This is what works for me, but I'd never presume to tell anyone else that they should do likewise. There are no quilt police - do whatever works for you. If you do fine with fabric straight off the bolt then there is no reason you should prewash.

Fabrics used to be processed with a lot of formaldehyde, which gave off unpleasant fumes before washing. I washed all fabric before I brought it into the house, as I got bad headaches from the fumes. The couple times I worked in a fabric store it took at least a couple months before I learned to ignore the headaches I got while working. I don't know whether they still use formaldehyde in fabric manufacture or not; I know they don't use nearly as much as they used to if it is still used, because the fumes aren't nearly as bad. I do know, however, that much of our quilting fabric is printed overseas because chemicals used are not allowed in this country by OSHA due to their toxicity. Fabrics used in antique quilts are often not available today - sometimes because the process to make them has been lost but sometimes because the chemicals needed to made them are too toxic. I prefer to wash as many chemicals out of my fabrics as possible.

I've had some bad luck with bleeding of fabrics that haven't been washed. I've had to touch up a quilt with a Q-tip dipped in bleach to take pink out of light fabrics that's bled from the reds and purples next to them. I don't want any more bleeding surprises when my quilts are washed. This is also why I sort by color before washing - I've had a couple surprises where one fabric has bled onto another during prewashing.

I've had fabrics shrink at different rates - some not at all and some as much as 4-5%. Since I use dozens of fabrics in a single quilt I don't want them shrinking at different rates because that might cause puckering in parts of the quilt.

I really do enjoy ironing my fabrics after prewashing. I take them from the dryer when they are still damp so the wrinkles come out easily. As I smooth each piece I drink in the colors, the design and the feel. I imprint each piece into my memory and dream of how I might use it. I become acquainted with each piece. The last 2-3 years I've done a lot of buying of "collections", so I don't really know what each piece looks like until I do this. Somehow my mind remembers each of them, so I've very rarely bought the same fabric twice. Books - yes - one even three times - but not fabric. I almost always sort fabrics by color for storage. When I'm doing a new quilt I decide on the colors, and then I pull 20-40 pieces of each color from my stash before beginning the quilt.

Since I bought my front loading washer I have much less trouble with strings on the prewashed pieces. I run them on "handwash" at the "quick" setting, using warm water and Orvus paste. I buy the Orvus at the feed store in a big jar that lasts many years. I think I'm on my third jar in 20 years. It's very economical that way. I trim the worst strings as I press, and I don't worry about the others.

If I have little pieces to wash - like what I get in a kit - I put them in a mesh hosery bag before washing them to protect them and prevent them from getting lost.

Washing does take away that new crispness, but it's easily replaced by using spray starch or fabric sizing as needed. Most of the time I don't need to do that. I like to use quilt shop quality fabrics, and they usually don't have the limpness after washing that cheaper fabrics do. I keep a can of spray starch ready for those that do.

I don't like to wait to wash fabrics until I'm going to use them because (1) I often use only a little bit of each fabric in a quilt, (2) I want to be able to cut all fabrics immediately when I'm creating - I don't want to wait to wash them, and (3) it would be impossible for me to remember which is washed and which isn't.

I hope this answers everyone's questions about why I prewash.

Saturday, September 2, 2006

A terrific Saturday

It's now 10:01 and I need to head to bed, but I wanted to write another post first. What a wonderful Saturday I had! Didn't get to sleep in much as Fred was up a wee bit after 6:00 a.m. getting ready to head to the golf course. Usually he's very quiet but between him and the dog and the lights in the hall I was awake by 6:15. I'd really had enough sleep so I got up then. Caught up on a lot of blog reading, had hot tea with milk and breakfast, then headed to the sewing room.

I looked at the It's a Wonderful Life quilt and realized I didn't like the fall border all that much either. I decided immediately that ideas needed some time to appear, so I folded it all up and put it on the shelf to "age" for a week or two while I decide what I want to do. The August installments of the Jan Patek mystery and Lori Smith's Heirloom Stitches arrived on Friday Thursday, so I've decided to skip August and call these the September installments. That way I won't feel behind. I set them at the end of the cutting table to work on either later this weekend or in the next week or two. I realized what I really wanted to do was take care of all my new fabric. But first I wanted to move my new featherweight cabinet into the room.

In the first picture you can see I put the cabinet against the wall just where my old one was. It was great - much smaller than the old table. But my chair didn't fit under it - the seat was too wide, so it pretty much blocked the "aisle" on that side of the cutting table. So I brought a chair down from the small oak table in the family room. That worked but had no support for my back. So I hemmed and hawed a bit, wondered what to do, and suddenly thought about turning it sideways. I couldn't do that with the other table because it was much too large. You can see in the second picture that this was a perfect solution. I have lots of room to move on that side of the cutting table, and lots of room behind my chair. No more backing into all the cubes in the middle of the room! And the chair actually faces the TV I have in the room! What a novel concept. That TV has no antenna and I've not connected it to cable, but it has a built in DVD player so I watch a lot of movies while I sew. The third picture shows the cabinet from the other side. See how convenient it's now going to be to reach stuff like my boxes of thread that I keep in the cubes. I love this new set up - I can hardly wait to try sewing with it!

Now it was about 10:00 a.m., and my daughter arrived for our "Starbucks Date". We went from there across the street to Costco so I could get some food and leave some class pictures from work for developing. I got a couple new DVD's that I hope to watch this weekend. Akeelah and the Bee - I'm really looking forward to seeing this as I missed it in the theatre. The other is a two part HBO presentation called Elizabeth I starring Helen Murren and Jeremy Irons - two of my favorite actors. I love all books and movies about the Henry VIII-Elizabeth I period of English history.

We came home, I got the food put away, and started separating all the new fabric into color piles for prewashing. Two loads of browns, three loads of creams and lights, and two loads of reds. I've got all the browns and most of the creams ironed and put away. The reds are still on the floor for pressing in the morning. I still have the blue, pink and green piles to wash. I love pressing the fabric when it comes damp out of the dryer. It allows me to become intimately acquainted with the color and pattern of each one, and starts my mind spinning with ideas. I'm putting all the new Mistletoe Manor fabric into a big basket as I press it - I can hardly wait to start cutting out my Christmas quilt! While pressing I listened to a Tony Hillerman Jim Chee-Joe Leaphorn audio book. I was going to listen to the Mariner game also, but it wasn't on due to Washington State Cougar football on the radio. So I kept listening to the mystery - I have only one disk left for tomorrow morning.

Had a great dinner of spinach salad and chicken enchiladas both from Costco - a perfect easy dinner - with a glass of white zinfandel. Then back to pressing, fitting in more blog reading in between pressing stints. I'm hoping to get all the rest of the fabric pressed and put away tomorrow so I can actually start sewing. But first I'll go upstairs in the morning while it's still cool and quilt some on Broken Dishes. I'd like to get the quilting finished by Monday evening.

A wonderful, perfect, mostly quilty today is my gratitude for this evening.

I haven't disappeared . . .

I've just been either away from home or swamped at work or trying to catch up on my sleep. It's been over two weeks since I did much of any quilting - and that alone can make me crabby. It's been almost two weeks since I picked up my new featherweight cabinet, and it still sits in the hall waiting for me to clean the sewing room enough so we can take it in. The next three days are all mine - I've probably got at least three times as many things on my "want to do" list than I'll have time for. It'll be fun trying!

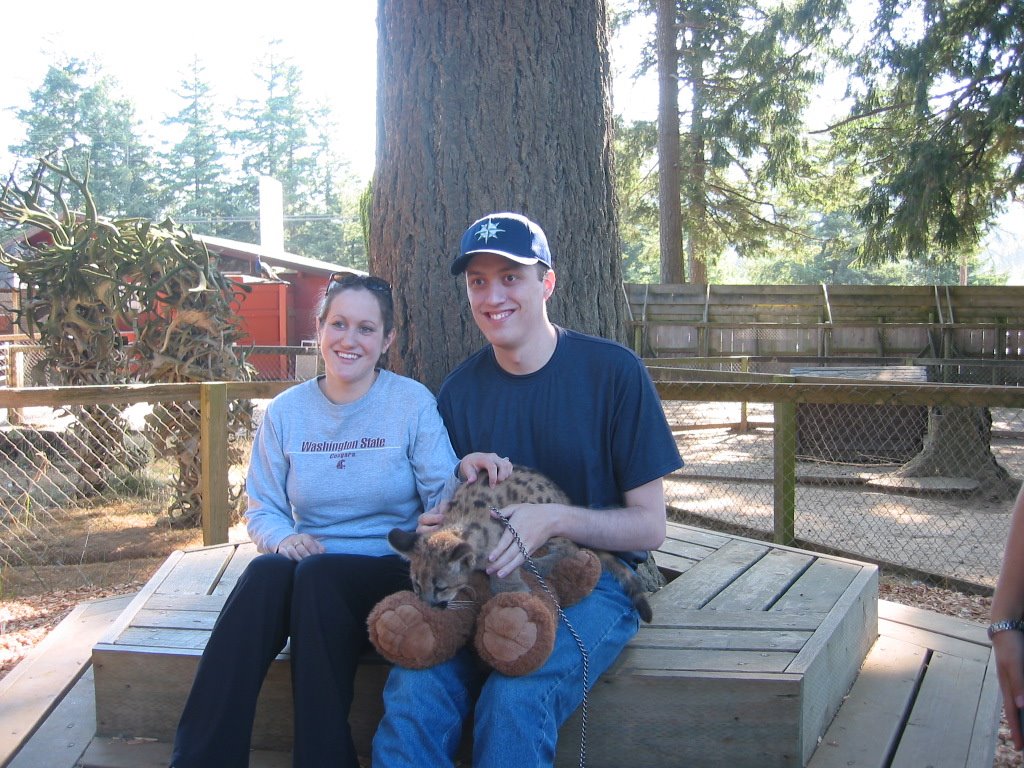
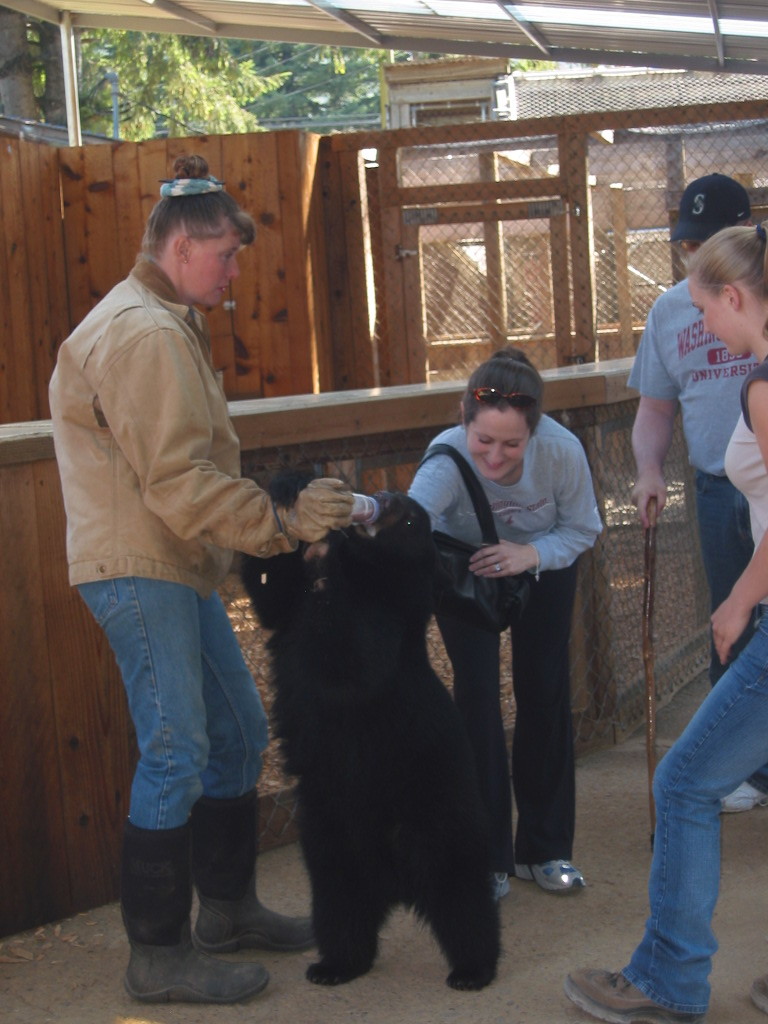
We spent last weekend with all our kids. The six of us piled into Jeremy's and Chelsea's new Pilot and headed down the Oregon coast to Coos Bay where we spent the night. Sunday morning we headed on to Bandon so we could reach the West Coast Game Park when it opened at 9:00 a.m. Jeremy and Chelsea discovered this place on their honeymoon and went back last summer. They had a new baby cougar this year so the Cougars in the family - Jeremy and DSIL Rick - decided we needed to become personally acquainted with the new baby. This was an amazing place - dozens of animals roaming freely. Lamas, sheep, goats, chickens, deer, peacocks, a donkey and more all begging for attention from the humans - or at least the food we bought to distribute. The wilder animals were in large cages like a zoo. At regular intervals the staff brings out babies for petting and photographing. We spent a good 3 hours exploring and communing with the animals. Lots of babies everywhere, and soon lots more will be on the way - judging by the behavior of the animals. We had lots of fun, but came home very tired from 5-6 hours in the car each day. I'd hoped to appliqué while we were driving, but I was in the very back and there just wasn't enough room back there.


I've had "It's a Wonderful Life" spread all over my cutting table for the past two weeks, trying to get the appliqués for the border cut out. I started working on the "winter border" corner and got stalled there. I just didn't like how it was going. I cut out some of the other border pieces but didn't pin them on as I didn't want to move the top until this corner was all ready to stitch. I haven't had time to do more than look at it now and then, but each time I looked I really didn't care for what I saw. I finally realized last night that I just don't like the design in the corner. The red claw-like things are supposed to be pomegranates, and they do nothing for me. I like the pineapple and the holly, but it just looks scrawny anweirdrd to me. Then I had a revelation - you can't imagine how daring this is for me - I realized I could change it any way I wanted to! This is a very bold step for me, as I always seem to follow patterns to the letter. I'm thrilled that I've finally "grown" enough in my quilting life that I feel comfortable doing this. I can't draw - but these are folk art shapes. I can draw those! So I think I'll leave out the red claws and add more holly leaves and clusters of holly berries instead. Now I feel re-energized and ready to get it all prepped for finishing. Jeanne, aren't you proud of me!!!!

I'm so far behind on both my blog and my email reading. I'm going to try to catch up this weekend. I want to get my featherweight cabinet moved into my sewing room. I want to start prewashing the Mistletoe Manor fabric. I want to put away the summer decorations and get out the fall things. Unfortunately I also have to do laundry, grocery shopping and a couple more less pleasant things. And hopefully I'll get to see the Mariners beat Tampa Bay at least twice!

************
Gratitudes:

1. Three day weekends
2. Fall - my favorite season - is almost here
3. Cool nights
4. Family fun
5. Blue skies

************