This isn't really a new method for hand applique - rather a new method for preparing the applique. Usually I don't like fussy preparation methods, as I'd rather just get to the sewing. I've decided I to like this, however, for several different reasons.
- There is no marking on the fabric at all, so no worrying about getting the black line completely turned under while stitching.
- All edges are nicely turned already, especially the curves, which makes the stitching go SO much faster!
- Because the edges are already turned, it makes placing all the pieces correctly in a complex applique piece much easier.
- Because of #3, it's easy to thread baste all pieces in place so I don't have little pins in the project that fall out or catch my thread as I sew.
- Because the edges are already turned, I can fold the back fabric as I stitch, making it much easier to catch only a couple threads on the fold of the applique, and thus my stitches are hidden much better.
- Unlike the starch method - similar to this except starch is used instead of water - I don't have any messy residue and I don't have to worry about bugs being attracted by the starch.
 Tools you need - a small iron that gets HOT. I have the little wand iron, but it doesn't get hot enough. I love my Rowenta Craft (used to be called Travel) iron. A seam ripper or a stiletto. I love using the stiletto. A paint brush. I like mine because of the slanted cut to the bristles and the plastic cushion where I hold it. Margaret had one like this, which she got at Joanne's. A small container for water. I like the small ironing pad also so I can sit down while I do this instead of standing at the ironing board. Freezer paper, scissors and a fine tip permanent marker.
1. Trace each applique piece onto freezer paper. If your design isn't symmetrical you will need to reverse the image. I do this by tracing on the shiny side of the freezer paper rather than the smooth, paper side. I like to cut a shape for each piece instead of using the same piece several times, as then I can do all the cutting and ironing at the same time. Cut our all the pieces.
2. Iron the freezer paper shapes to the wrong side of your fabric, leaving seam allowance space between the shapes. Put the curved parts of each piece on the bias whenever possible. Cut out each piece, leaving 3/16" seam allowance all around the piece (think a very fat 1/8", but less than 1/4").
 3. Using the paint brush, wet just the seam allowance. If it's a big piece I do this in sections, pressing each one before painting the water onto the next one.
 4. Using the stylus or seam ripper, fold the seam allowance over right at the edge of the freezer paper, using your fingertips of your other hand to hold it down as you turn. Press the edge well with your DRY iron. You shouldn't burn your fingers as long as you don't try to use
  steam. Because the fabric is wet it will crease nicely. Do just a little bit at a time - if you try to do too much your fingers won't be able to hold it down. (You don't see my fingers holding down the edge as I'm turning here because my other hand had to hold the camera!)
 5. Curves turn under easily if they are on the bias. You will need a clip or two at inner curves - just make sure every thread turns under. For outer curves just fold a tiny bit at a time to keep the edge smooth. Try to have no large folds, as they will make a point instead of a smooth curve. Use your stylus and turn only a tiny bit at a time, holding the SA under with the tip of your finger as you turn.
 6. Work your way around the entire piece. Give it a final good press on all the edges - both back and front. Fix any points that you see by opening up that spot, wetting it again, ironing it
  flat and then turning it again. When done, just pull out the freezer paper. Fabric has wonderful memory, and the edges will turn back very nicely even if they flatten a bit while waiting to be stitched down.
It will go a bit slowly to start with as you get used to turning the edge and pressing. At first I pressed under part of the freezer paper too, resulting in an edge that wasn't smooth. It took me a couple sessions of practice before I could do this easily and quickly. Don't give up right away if at first you find it a bit tricky and time consuming. You will soon get the right feel of the process.
If you've tried needle turn and given up, try this method. The stitching is so easy when the edges are already turned in place. I first tried this method on the little gold "vases" on the outside borders of Heirloom Stitches. It seemed to take forever to prep those 20 little pieces. I wondered if it was worth the effort - until I started to applique them. That's when I fell in love, because the stitching went so very fast. The second time for this method was the center block in the "Holiday Inn" medallion. The prep went very quickly on that one - just part of one evening. That's when I became totally sold on the method.
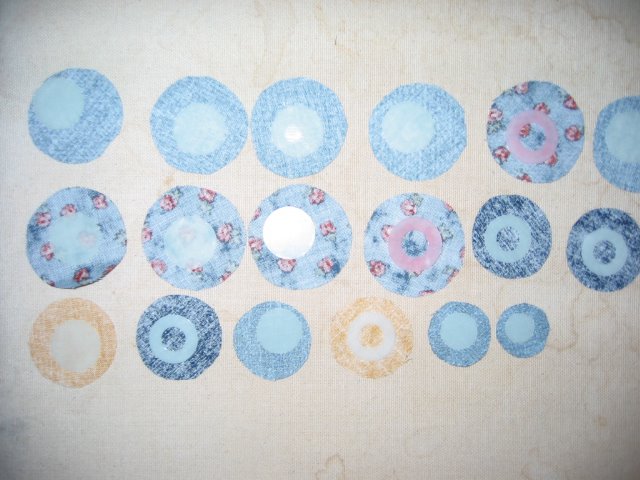
One more hint - the circles are still done with the Mylar washers. Check my other applique tutorials to see how to do them.


 When you've pressed all the crumb-strips take them to the cutting table. Cut the strips between each crumb.